Installation Guidelines for Quantra Sinks, Basins & Shower Trays
General Guidelines
1. Always inspect the sink(s) closely for any damages before installation. Take care such that no damage occurs during handling as Quartz sinks are heavy.
2. Adhere to all relevant local building and plumbing codes.
3. Undermount sinks should always be installed only by an experienced professional.
4. The sink comes with a paper template. Or, a DXF file can be downloaded from www.quantra.in for use with a CNC machine. The paper template or DXF should serve only as a guide. The actual sink should always be present prior to making a cutout. It is the responsibility of the installer/fabricator to check all the dimensions prior to cutting any countertop material.
5. When installing into solid surface or stone countertops, always use a quality silicone sealant and undermount clips/fasteners provided with your sink.
6. Please ensure to check the colour match/shade variation between the Quantra counter top and the sink. Quantra cannot be held liable for shade variations between the sink and countertop in the case they have been manufactured separately.
7. Please pay special attention to all of the mentioned guidelines. The steps described are important for the correct installation of the Quantra sink into the countertop. Quantra cannot be held responsible for any errors that result from not adhering to the provided guidelines.This manual is not meant to be used for any other purpose, nor is it considered to be legally binding.
Instructions for Installation
1. Check the dimensions of your sink relative to the paper template dimensions. Adjust your template to adjust your reveal dimensions. Consult the customer about their preferences regarding a positive or negative reveal.
2. Locate template in desired position on countertop while keeping in consideration the location of the faucet placement and cabinet constraints.
3. Trace the template and cut the counter top surface on the inside of the line.
4. Loosely install fasteners by following the counter top manufacturer’s instructions. Ensure to evenly space the fasteners.
5. Position and align the sink in the correct position over the opening.
6. The worktop and the sink must be properly cleaned with alcohol before applying silicone. Otherwise, the countertop and sink will not bond properly. Make sure to use a silicone sealant that is colour matched
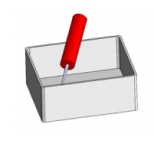 Application of the silicone sealant
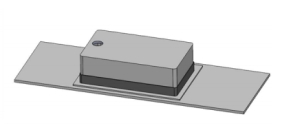 Clean both the Worktop and the Sink before applying the silicone sealant
7. After the application of the sealant, fasteners can be used to secure the sink and the countertop until the adhesive cures properly.
8. During Installation the sink waste and overflow components should not be obstructed.
9. It is also advisable to fix strips on the bottom side of the countertop such that it covers the entire area to the full width of the kitchen base unit.
10. Tighten fasteners to secure sink and check alignment of sink to the opening.
11. Double check tightness of fasteners and remove any excess silicone. After silicone has cured, wipe the bead with a wet cloth. This should smooth out any rough areas.
12. Finally, the inner edges of the sink can be polished to create a bevel that enables a neat joint between the countertop and the sink.
 Sink Polishing
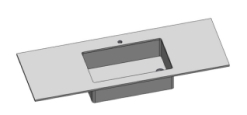 Finished Product
Fixing a sink using fastening belts
1. The belts need to be fixed with screws on both sides of the existing kitchen furniture. Before fixing the belts, make two boreholes on both ends of the furniture to add the screws. On the other side of the furniture, screw the wood buckles with two screws and two washers for each buckle. In order for the belts to have the maximum possible tension for the sink ensure to cross the belts through the buckles and place the sink on the belts.
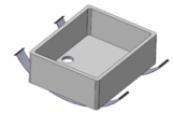
2. Apply the silicone through the edge of the sink and clean off any excess silicone before it fully hardens. You must use the correct colour silicone to bond the sink and countertop (Silicone sealant is provided along with the sink).
3. Once the silicone has been applied. The sink should be offered up to the countertop by using the anchorage system and adjusting the support bolts. Level the sink in order to ensure a good silicone bond between the countertop and the sink. Care must be taken to ensure a perfect bond and do not over tighten the bolts.
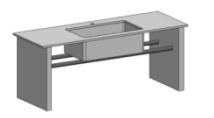
Quantra washbasins can be installed either on a wall or on a furniture base. Before installing the washbasin, ensure that you have a drain valve and installation supports (in the case of washbasin with sink base).
Washbasin with a wall support
1. Measure the dimensions of the washbasin and mark them on the wall
2. In order to locate the first support,refer to the upper right corner of the flange with 4 holes. Generally, this should be placed horizontally 4-5 cm from the outside wall of the washbasin and vertically 2 cm below the chosen height. Care must be taken that the two supports must be perfectly levelled.
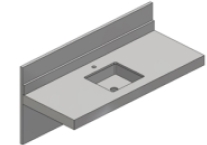
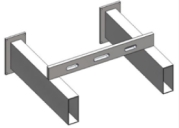
3. When placing the washbasin on the supports ensure that at each end one lateral support must be placed, with a maximum distance of 120 cm between them. The maximum weight that each support can bear is over 150 kg.
4. In case of a twin washbasin, it is mandatory to place a third intermediate support at an equidistant position. So that the weight is distributed uniformly.
5. Apply silicone on the upper edge of the support and on the internal perimeter of the washbasin countertop before positioning the washbasin. A minimum of 1/8” between the washbasin and the wall should be left as a gap.
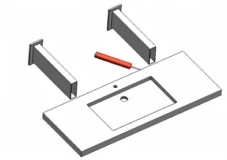
6. Place the worktop on the supports and check that the sink is centred and level. Ensure that the positioning area is free of any debris.
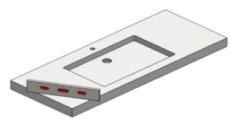
7. Seal with silicone in the area between the washbasin and the wall. Finally, install the tap fittings and drain connections.
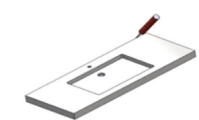
Instructions for Installation
1. Clean the area where the Shower Tray is to be installed. Check the connection dimensions of the drain and pipes. Perimeter joints must also be taken into account.
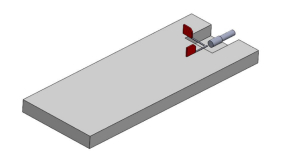
2. Check the drain with the shower tray and connect it with drain pipes.
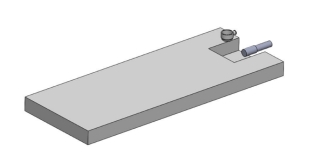
3. Apply concrete bonding and lay the shower tray while maintaining the perimeter joints. Apply the silicone adhesive around the perimeter.
4. Position the drain valve, incorporating the flat joint in the lower area and anchoring the clamp manually.
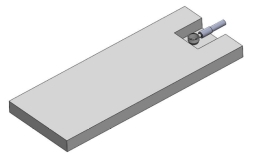
General recommendations for the installation of Shower Trays
1. The shower tray must be protected during installation and until the work is completed.
2. The Shower Tray must have permanent support for their entire surface.
3. Allowance must be provided for perimeter joints before installing the shower trays.
4. For the usual cleaning of these surfaces, Quanta recommends the use of a mild soap.
